
One account works well for locations of the same format with a similar menu. If your locations have different formats and their menus differ by more than 15%, it's better to manage them in separate accounts.
One account
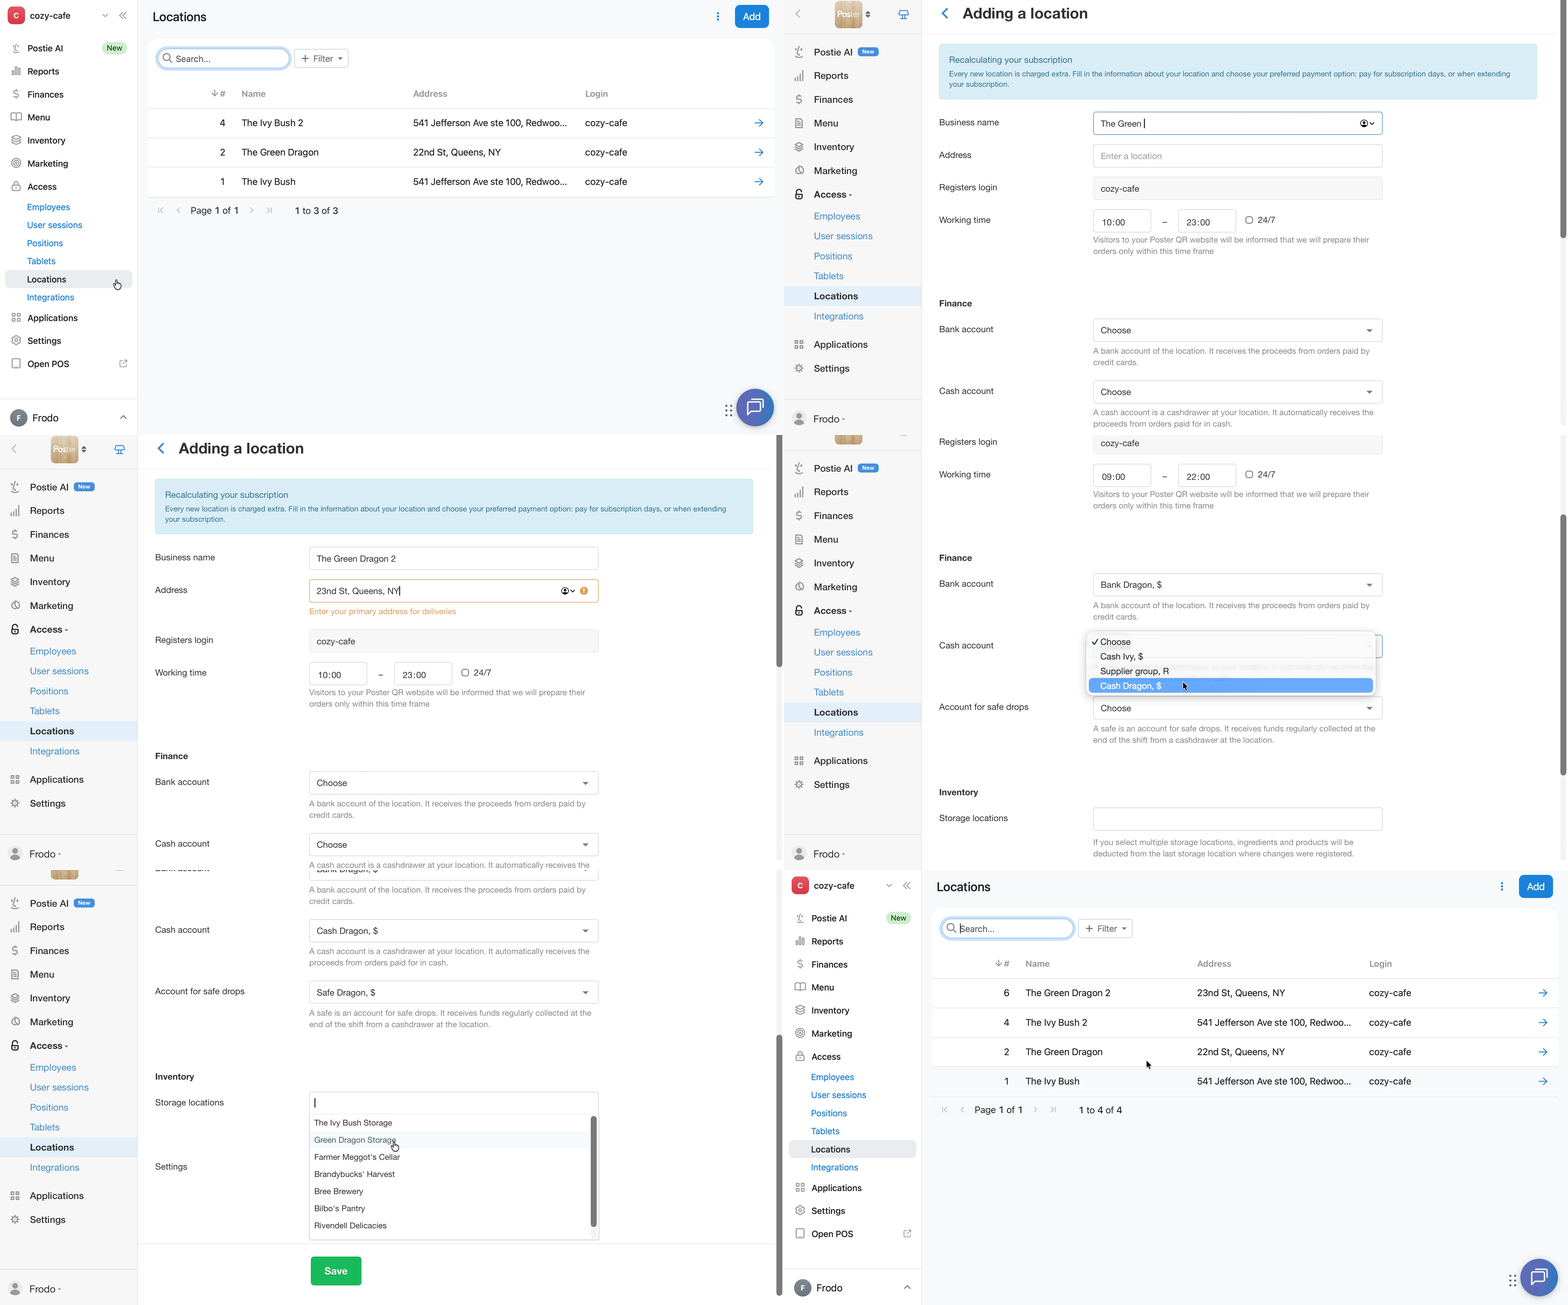
One account suits locations of the same format with a similar menu. In it, you can:
- set different prices and product availability for each location;
- keep shared financial and inventory records;
- move products between location storages and make transactions between their accounts;
- run cash shifts for each location;
- view sales and statistics for each location or for all locations at once in the management console and the Poster Boss mobile app.
In a shared account for all locations, you can't:
- use different pricing plans;
- choose different location types;
- restrict employee access to management console sections by location;
- set different account settings and security settings.
☝️ Each additional location already includes 1 Poster register, and it costs the same as your account's pricing plan.
💡 To combine locations of the same format with similar menus in one account, add additional locations.
Separate account
If your locations have different formats and their menus differ by more than 15%, use separate accounts. In each account, you can:
- keep separate records;
- choose a different location type;
- choose a different pricing plan with additional features;
- connect integrations with services that other locations don't need;
- quickly switch between accounts and view statistics in the Poster Boss mobile app.
In separate accounts, you can't:
- view statistics for all locations in one report;
- move products between storages of different locations;
- transfer money between accounts of different locations;
- build a combined financial report for all locations.
💡 If you want to create another Poster account with the same email, you don't need to sign up again.
Log in to your account, go to the My accounts page, click Create account, and enter the location name, your name, and phone number. Your password will be filled in automatically.
To keep financial and inventory records, link accounts and storages to locations