
How to filter supplies
In Inventory → Supplies, use the filters above the table to find supplies by specific criteria. There are two types of filters:
- Main filters — Supplier, Storage, Account, and Categories. Select the required values from a list.
- + Filter — set additional search conditions by number, amount, status, comment, employee, and other criteria.
How the main filters work in the supplies list
In Inventory → Supplies, click the required filter above the table and select one or more values from the list. To find a specific value faster, use the Search field. Click Select all to select every value or Clear to deselect them.
- Supplier — supplies from the selected suppliers.
- Storage — supplies recorded for the selected storages.
- Account — supplies paid for from the selected financial accounts.
- Categories — supplies containing ingredients or products from the selected categories. Subcategories appear under their parent categories, for example, Drinks → Coffee.
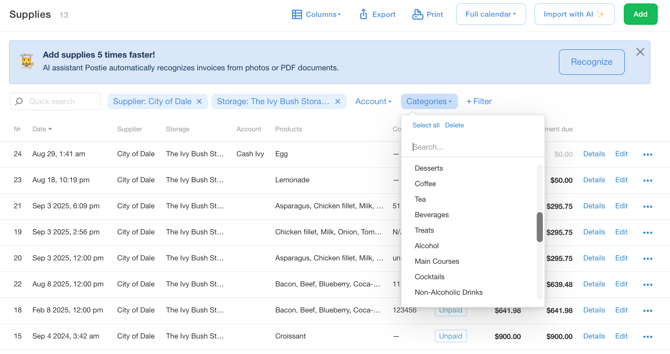
💡 Deleted suppliers, storages, accounts, and categories also appear in the filter lists. They are highlighted in gray. Select them to find supplies associated with these deleted items.
How to set additional conditions using + Filter in the supplies list
- In Inventory → Supplies, click + Filter above the supplies table.
- In the Show only those where field, select a parameter, such as Amount or Products.
- Select a condition, such as Greater than or Contains.
- Enter or select the required value.
- To narrow down the search results, add another condition by clicking + Filter again.
The table will display only supplies that match all the selected conditions.
What + Filter conditions are available for numeric supply fields
The following conditions are available for numeric supply fields: Equal to, Not equal to, Greater than, and Less than:
- No. — the supply number in Poster.
- Product count — the number of different items (ingredients and products) in the supply.
- VAT — the VAT amount in the supply.
- Amount — the total supply amount.
- Debt — the amount of the supply that has not yet been paid to the supplier.
What + Filter conditions are available for text supply fields
The following conditions are available for text supply fields: Equal to, Not equal to, Contains, Is empty, and Is not empty:
- Account — the name of the financial account used to pay for the supply, for example, "Bank account". The filter searches by account name, not by payment amount.
- Products — the name of an ingredient or product in the supply.
- Categories — the name of a category of ingredients or products in the supply.
- Comment — the text of the comment added to the supply.
The Contains condition finds matches even if you enter only part of a word. For example, searching for "anchovy" will show supplies containing the product "Anchovies". The Is empty and Is not empty conditions help you find supplies with empty or completed fields.
What + Filter values are available for supply fields with a list of options
For the Status, Employee, and Deleted fields, select the required values from the list. Use the Search field to find a specific value, and the Select all and Clear buttons to select all values or deselect them.
- Status — Paid, Unpaid, or Unprocessed supply.
- Employee — the employee who created the supply.
- Deleted — select Yes to show only deleted supplies or No to hide them from the supplies list.
The Account and Categories fields are available both among the main filters and under + Filter. Use the main filters to select values from a list, or use + Filter to set additional conditions, such as Contains or Is empty.
Examples of filters in the supplies list
- Find unpaid supplies: click + Filter, select Status, and check Unpaid.
- Find supplies with outstanding debt of more than $200: click + Filter, select Debt → Greater than, and enter 200.
- Find supplies containing a specific product: click + Filter, select Products → Contains, and enter the product name or part of it, for example, "anchovy".
- Find a supply by number: click + Filter, select No. → Equal to, and enter the supply number.
- Find supplies created by a specific employee: click + Filter, select Employee, and check their name.
- View deleted supplies only: click + Filter, select Deleted, and check Yes.
- Hide deleted supplies: click + Filter, select Deleted, and check No.
How to combine multiple filters in the supplies list
In Inventory → Supplies, you can apply several filters at the same time to narrow down your search results. Poster will show only supplies that match all the selected conditions. Filters also work together with the selected date range and quick search.
For example, to find unpaid supplies from a specific supplier for the previous month:
- In Inventory → Supplies, click the date range selector in the upper-right corner of the screen and select the required period.
- In the Supplier filter, select the required supplier.
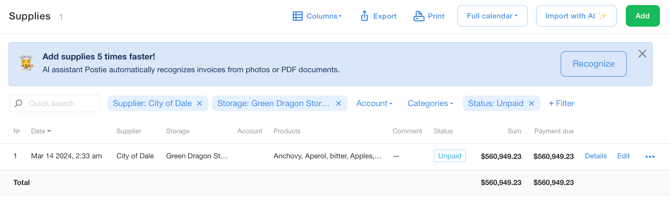
- Click + Filter, select Status, and check Unpaid.
How to reset filters in the supplies list
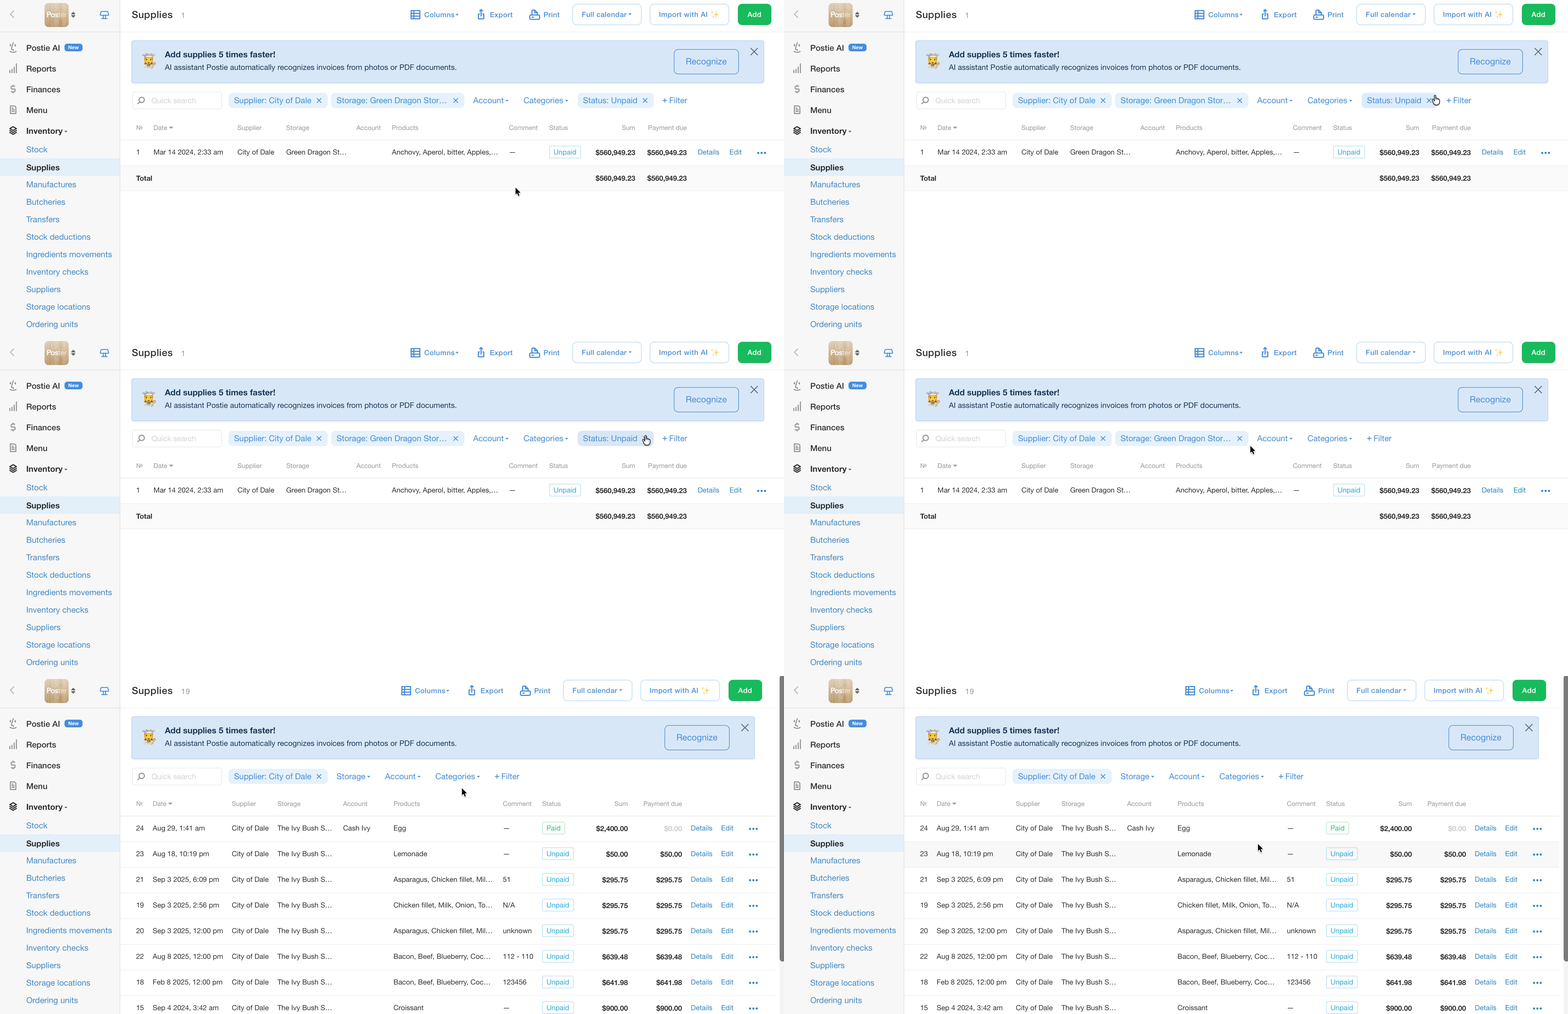
Applied filters appear above the supplies table as highlighted tags, for example, Supplier: Purchasing or Status: Unpaid. To remove a specific condition, click × on the corresponding tag. The supplies table will update immediately without that filter.
How to select a date range in the supplies list
- In Inventory → Supplies, click the date range selector in the upper-right corner. By default, it displays Full calander.
- Select a preset period: Today, Yesterday, Last 7 days, Last 30 days, the current or previous month, or Full calander.
- To select a custom period, click the start and end dates in the calendar, then click Apply.
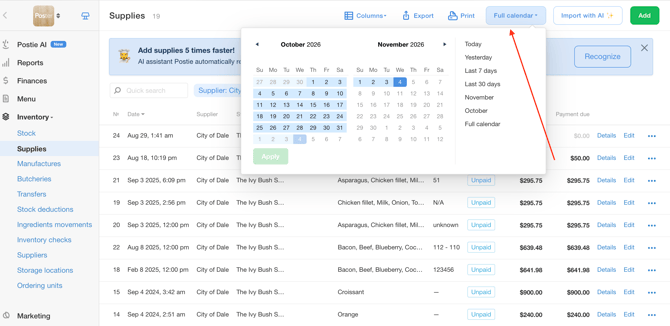
The table will display only supplies dated within the selected period. To show all supplies again, click the date range selector and choose Full calander.
How to find a supply using quick search
In Inventory → Supplies, enter the name of an ingredient or product, or part of its name, in the Quick search field above the table. The table will display supplies containing that product. Quick search works together with filters and the selected date range.
How to customize columns and sorting in the supplies list
- In Inventory → Supplies, click Columns in the upper-right corner.
- Check the columns you want to see in the supplies table or uncheck the ones you want to hide. The available columns are Date, Supplier, Storage, Account, Products, Product count, Categories, Comment, Status, VAT, Amount, Debt, and Employee.
- To sort supplies by the values in a specific column, such as date or amount, click its name in the table header. Click it again to reverse the sorting order.
- To restore the default set of columns, click Reset to defaults in the Columns menu.
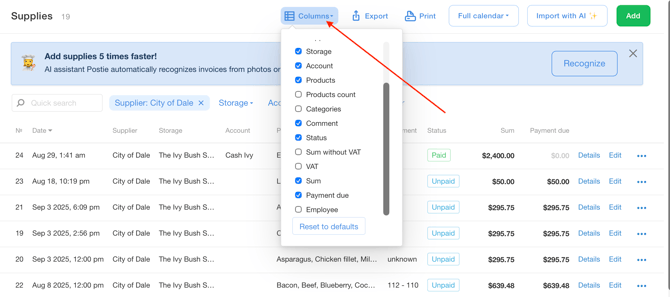
Your selected columns are saved, so the supplies table will open with the same columns next time.
How to view the total supply amount for a period
In Inventory → Supplies, the Total row below the table displays the total supply amount and outstanding debt. These values update automatically based on the selected date range and applied filters.
For example, to check how much you still owe a specific supplier for the previous month, select the required period and filter supplies by that supplier. Then check the Debt column in the Total row.
How to view products and ingredients in a supply
In Inventory → Supplies, click Details next to the required supply. A list of ingredients and products will appear below the supply row, showing their packaging, quantity, and amount. Click Details again to collapse the list.

💡 Details are also available for deleted supplies. Deleted supplies are highlighted in red in the supplies list.
How to print or export the supplies list
- In Inventory → Supplies, select the required date range and apply the necessary filters.
- To print the supplies list, click Print in the upper-right corner of the screen. The print window will open, where you can select a printer or save the list as a PDF.
- To export the supplies list to a file, click Export.
Printing and exporting the supplies list take the selected filters and date range into account. Before printing or exporting, check which supplies are currently displayed in the table.
To print an individual supply, click Edit next to the required supply. Then click Print on the supply page.
Frequently asked questions about finding supplies
- Why can't I see some supplies in the list? The selected date range or active filters are usually hiding them. In Inventory → Supplies, click the date range selector and choose All time. Then remove unnecessary filters by clicking × on the tags above the table and clear the Quick search field.
- What does the message "No data matches the selected filters" mean in the supplies list? No supplies match the selected filters, date range, or quick search query. Remove some filters or change the date range.
- Why can't quick search find a supply? Quick search in Inventory → Supplies searches supplies by the names of ingredients or products they contain. To find a supply by its number, supplier, amount, or comment, use filters.
- Why can't I see a deleted supply in the supplies list? Check whether the Deleted: No filter is applied. It hides deleted supplies. Remove this filter by clicking × on its tag, or go to + Filter, select Deleted, and check Yes.
- Why can't I see a required column in the supplies table? Column settings are saved, so previously hidden columns won't appear automatically. Click Columns and check the required column, or click Default to restore the default set.
- Why aren't supplies sorted by date or why are they displayed in the wrong order? Check whether the Status or Account filters are applied. Remove them by clicking × on the corresponding tags above the supplies table, then click the Date column header again.
- How can I find out which employee created a supply? In Inventory → Supplies, click Columns and check Employee. The table will display the names of employees who created the supplies. To show only supplies created by a specific employee, click + Filter, select Employee, and check their name.