
To add a supply at the POS register:
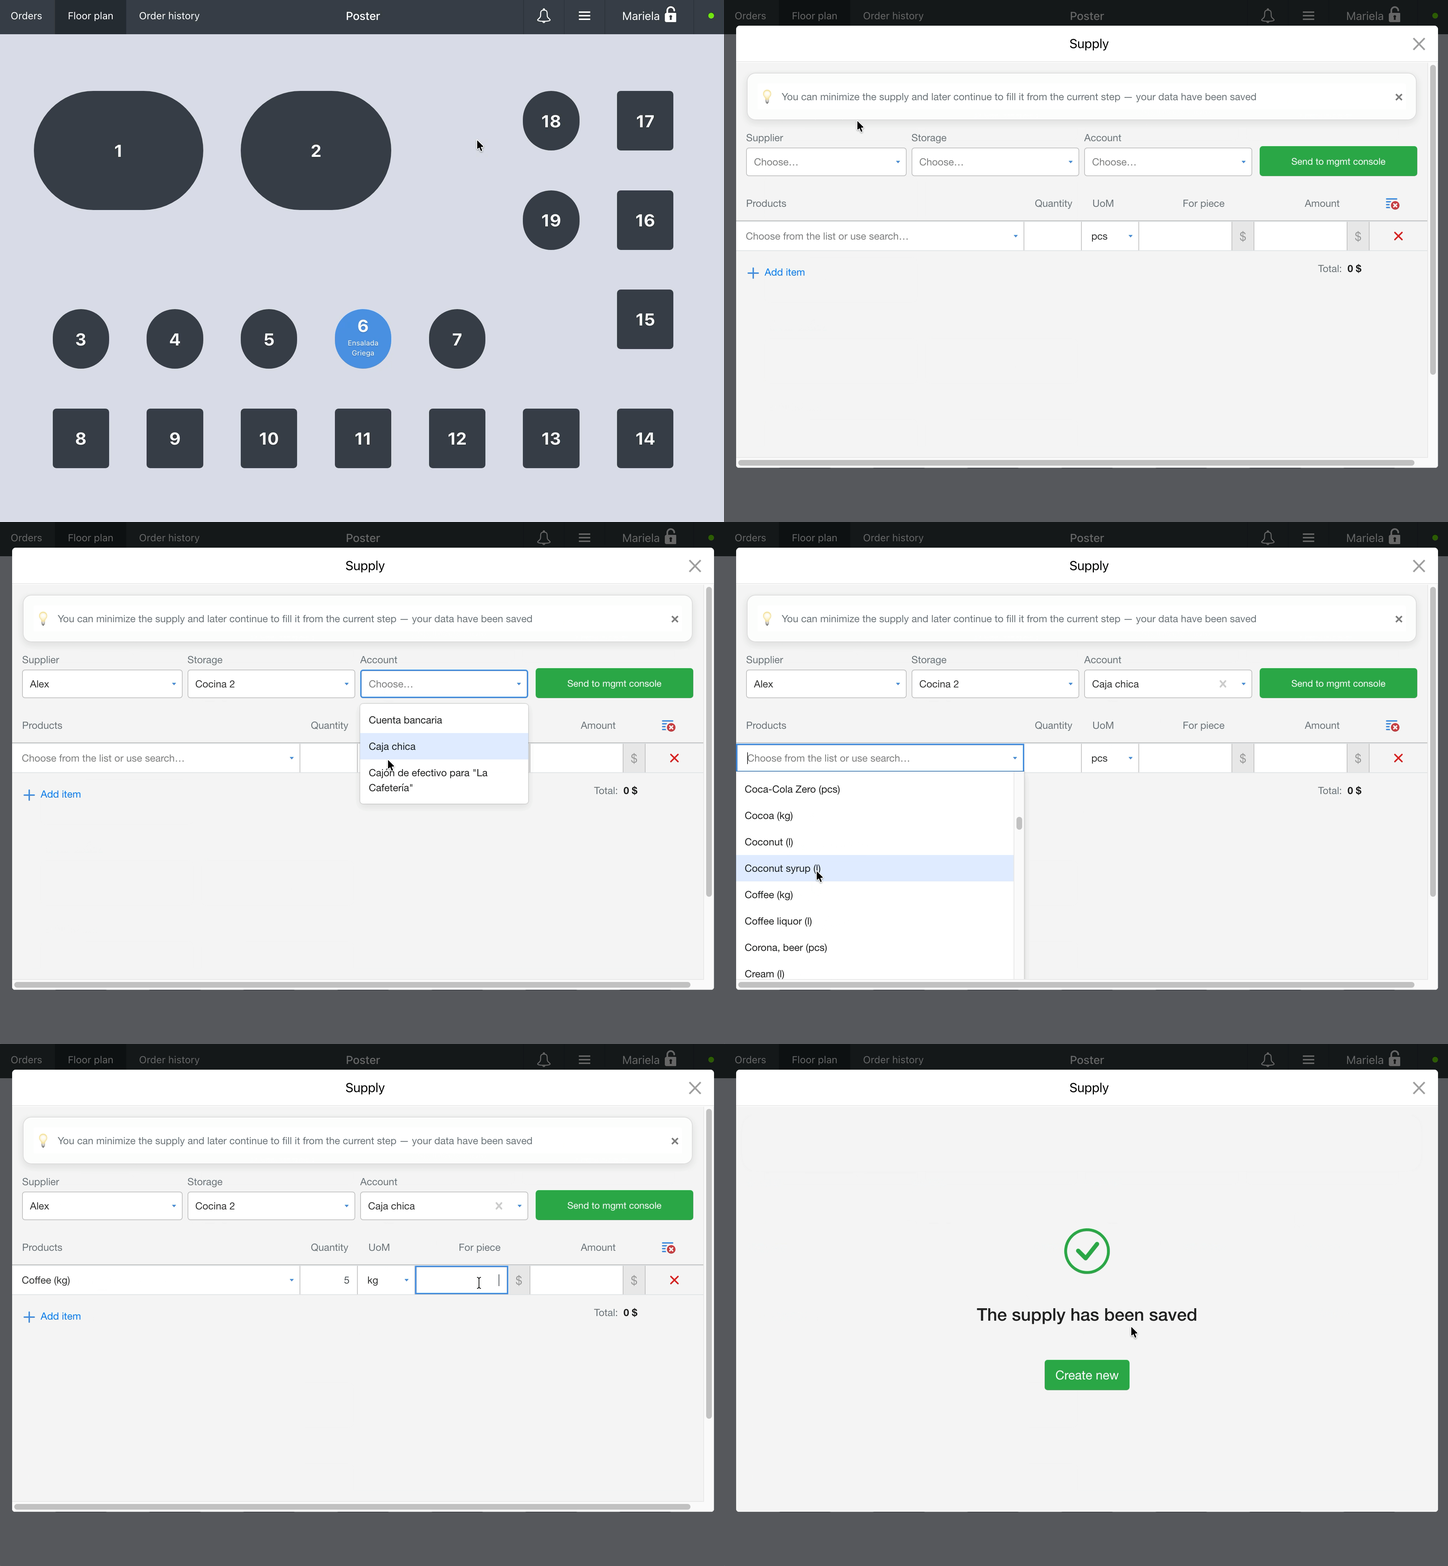
- Tap ≡ at the top right and, in the Apps section, select Supply.
- In the Supplier field, select from the list the name of the person or company that supplies you with products.
- Select the storage where the products will be kept.
- In the Account field, select the account you use to pay for the supply.
☝️ If you select a cash account, for example, «Cash drawer», an expense transaction for the supply amount will be added to the cash shift. If you don't select a financial account, the supply will have the «Unpaid» status in the management console. - Select products from the list or use the quick search.
- Enter the quantity, the ordering unit, the cost per unit, or the total supply amount.
💡 Use ordering units, for example, when you receive milk in packs of 6. Enter the number of packs, and Poster will count the bottles. - Tap + Add product to add more products, or tap × to remove a product you don't need from the supply.
- Tap Send to management console.

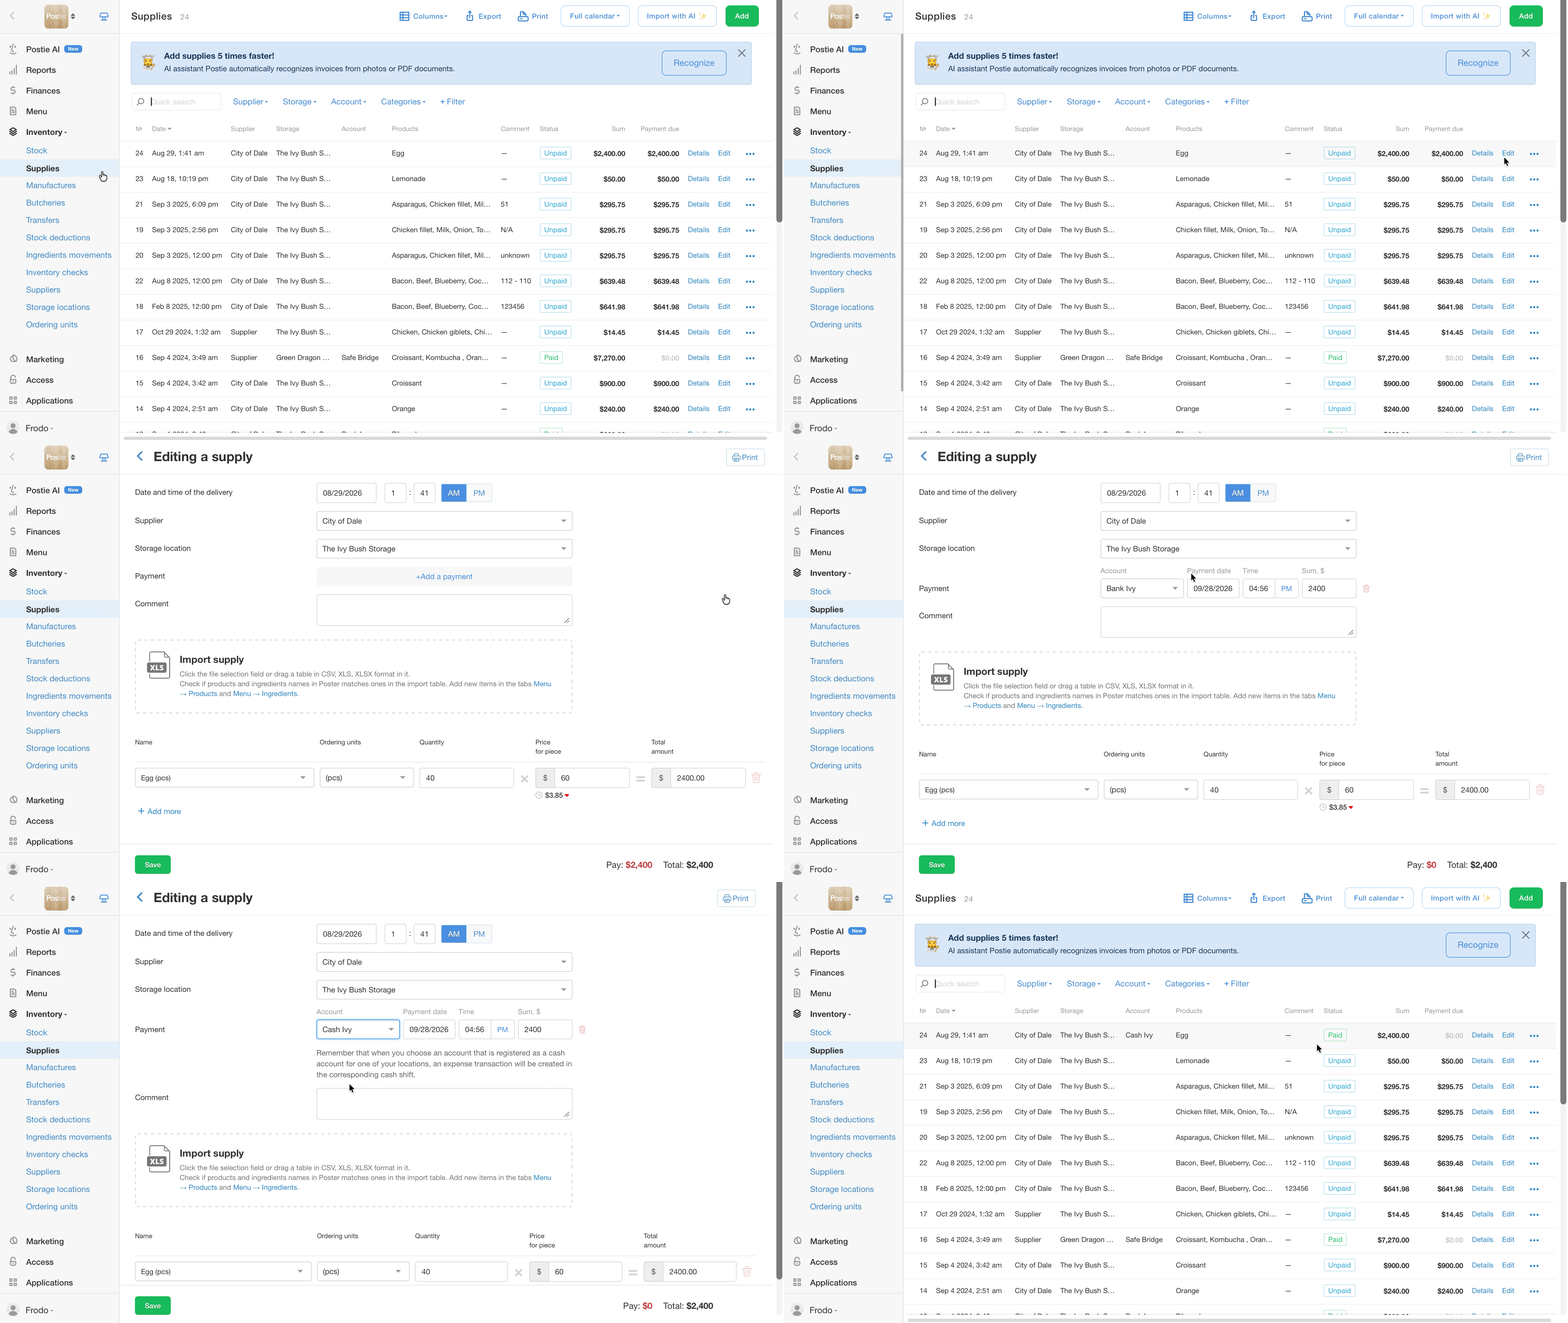
💡 If you didn't select a financial account when receiving a supply at the POS register, you can pay the supplier later. To do this, go to Inventory → Supplies in the management console, tap Edit next to the unpaid supply, and add the payment in the Payment field.
💡 To allow only an administrator to add supplies at the POS register, require the administrator password in the management console. To do this, go to Settings → Security, select Always for When adding a supply at the POS register, and save the changes.
Keep taking orders at the POS register. You can close the supply and finish filling it in later from where you left off.