
Connect the POS Transfers integration so employees can create transfer requests and transfer products and ingredients between storage locations directly in the POS. You won’t need to switch to the management console every time, and all transfers will remain under control.
💡 The integration is free.
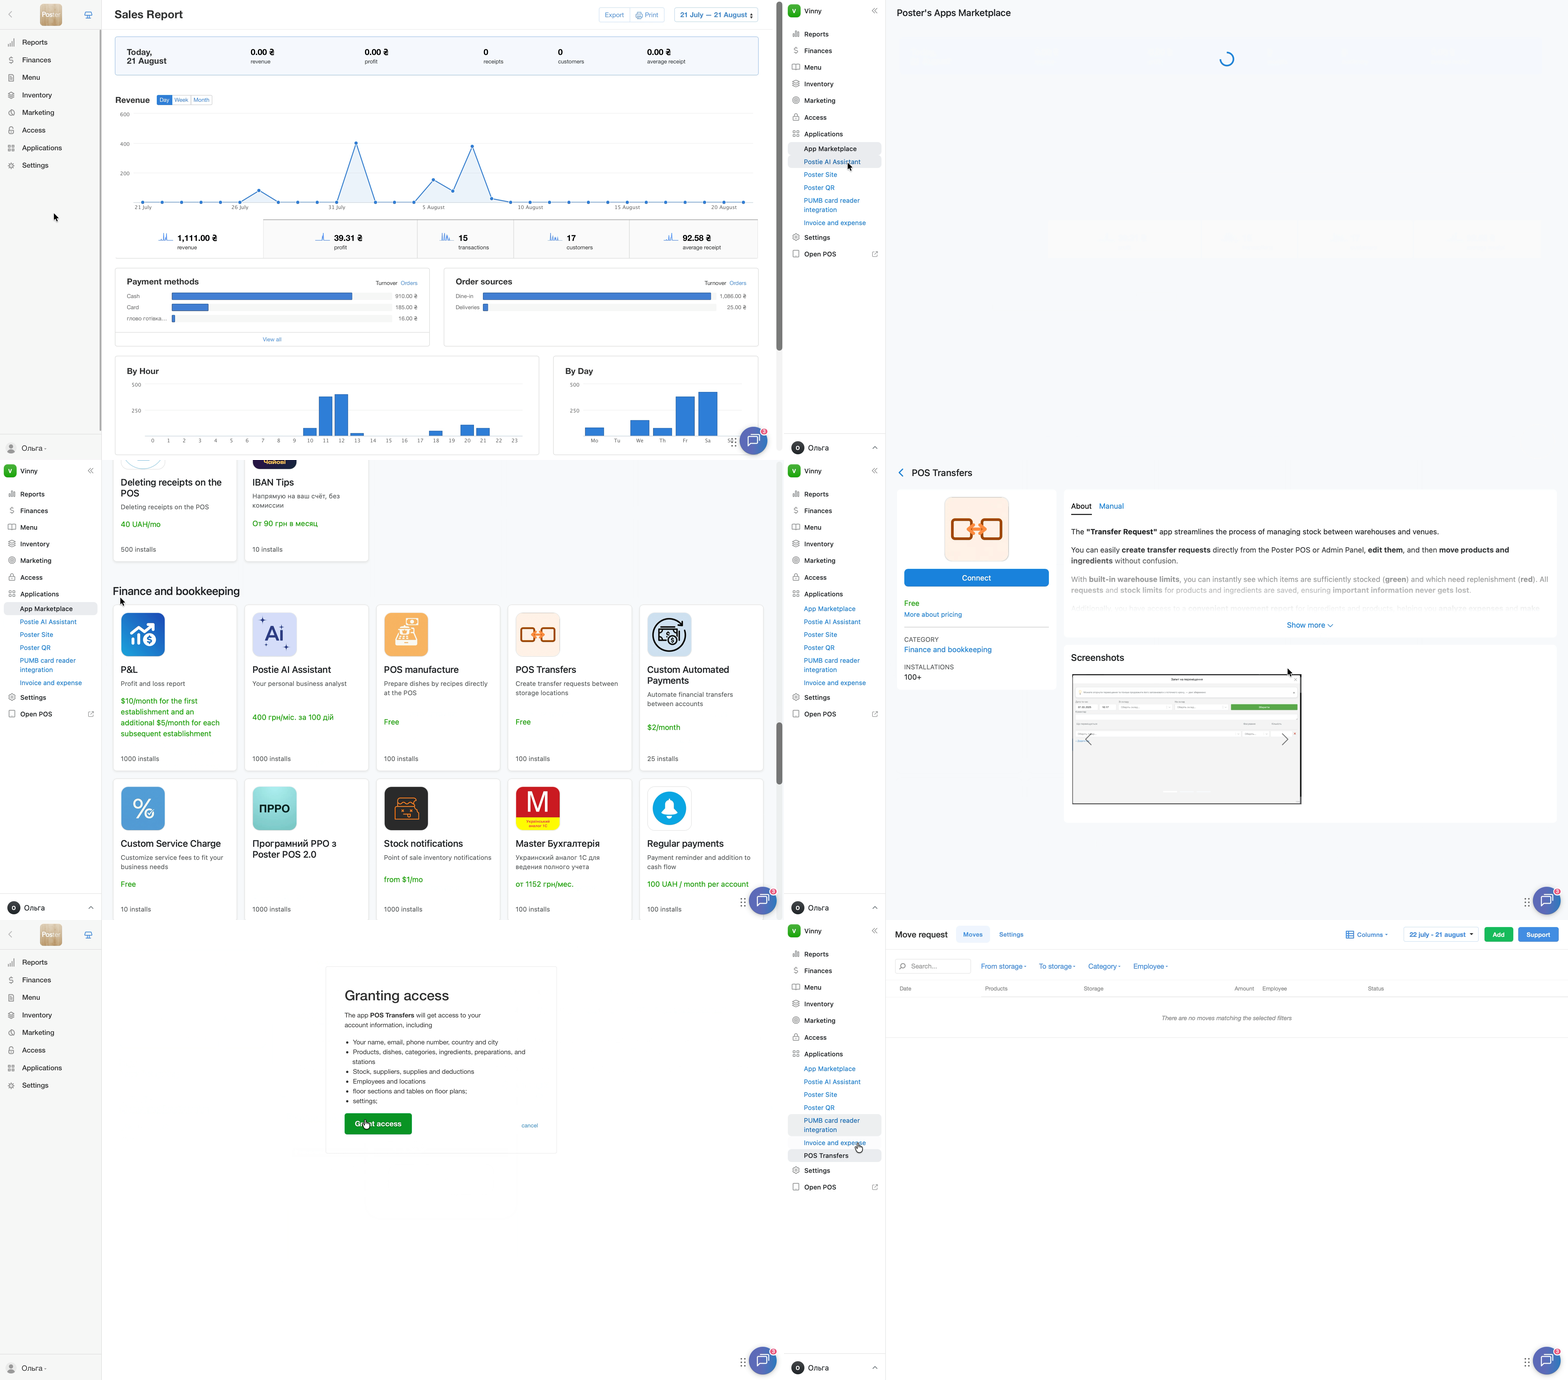
How to connect POS Transfers
- Open Apps → App Marketplace in the management console.
- Find POS Transfers in the app catalog.
- Click Connect.
- Grant the app access to your Poster account data.
How to set up employee access to transfers in the POS
After connecting POS Transfers, set up which employees will create transfer requests and which will transfer products directly in the POS:
- Open Applications → POS Transfers.
- Go to Settings.
- Select the employees who can create transfer requests. These requests must be confirmed in the management console.
- Select the employees who can transfer products directly in the POS without additional confirmation.
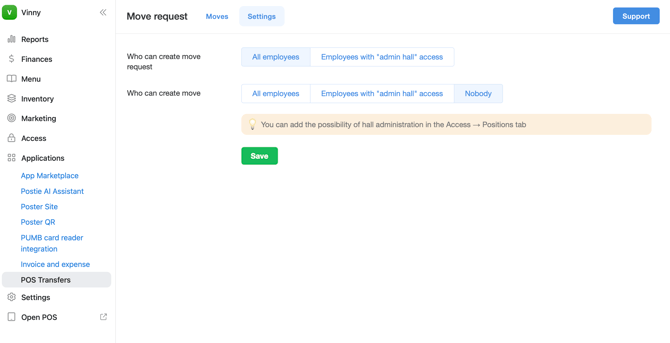
☝️ You can set up different access levels for different employees. For example, cashiers can create transfer requests only, while an administrator can transfer products directly in the POS.
How to create a transfer request in the POS
- Open the Poster app.
- Tap ≡ in the top right corner and select POS Transfers in the Applications section.
- Select the storage location from which you want to transfer the products.
- Select the storage location to which you want to transfer the products.
- Add products or ingredients and specify their quantity.
- Tap Save or Move.
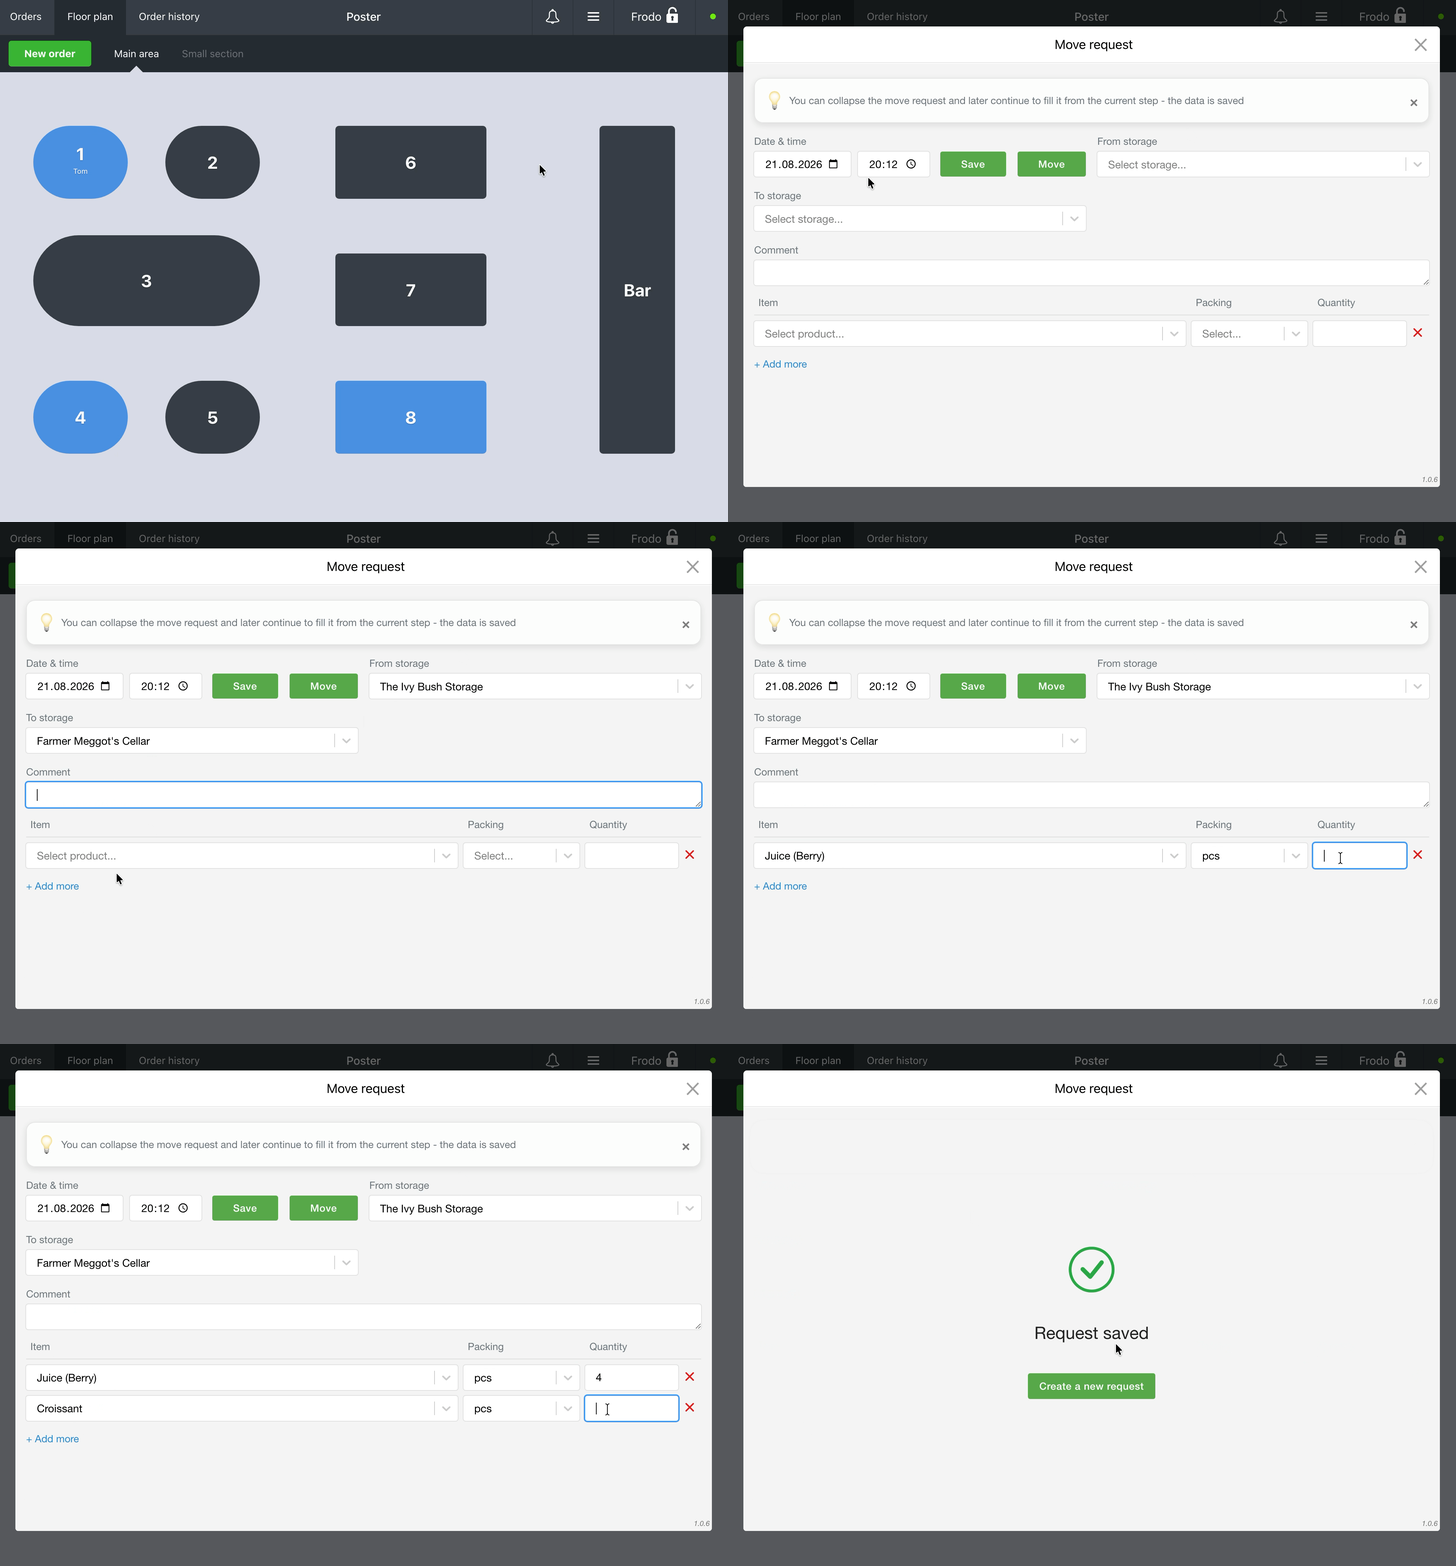
The transfer request created in the POS is immediately sent to the management console. An employee with access to the management console can review, edit, confirm, or delete the request.
☝️ If stock limits are set up for products, the app won’t allow employees to transfer a quantity that exceeds the stock available at the source storage location. This helps prevent transfers with incorrect product quantities.
How to save or print a transfer request
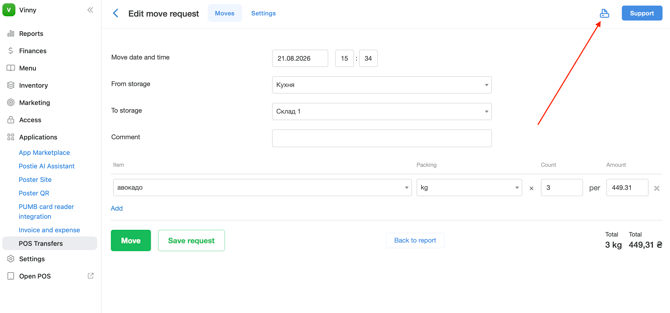
To keep a copy of a transfer request created in the POS, save the request as a PDF or print it:
- Open Applications → POS Transfers in the management console.
- Click Edit next to the required request.
- Click the printer icon 🖨️ in the top-left corner of the screen.
- Save the request as a PDF or print it.
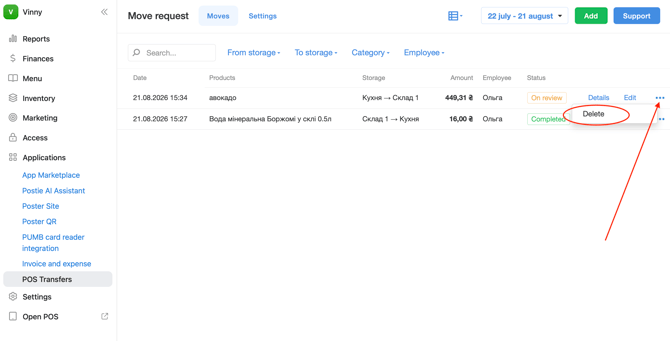
How to delete a transfer request
If a transfer request was created by mistake or is no longer relevant, delete it in the management console:
- Open Applications → POS Transfers.
- Click · · · next to the required request.
- Select Delete.
Limitations
- POS Transfers is free, but it must be connected in App Marketplace before employees can use it.
- Without configured access in the Settings section of POS Transfers, an employee won’t be able to create a transfer request or transfer products in the POS.
- All transfers created in the POS and completed or confirmed are also displayed in Inventory → Transfers in the management console. There is no separate list of POS transfers.