Create a contactless menu for your establishment with Poster QR — a convenient online menu accessible via a QR code or a short link. The QR menu automatically populates with dishes from your Poster account.
The menu is mobile-friendly and its design can be easily customized. Before you start taking orders, tailor your menu to match your location by adding detailed information about your dishes and choosing your brand’s colors and accents.
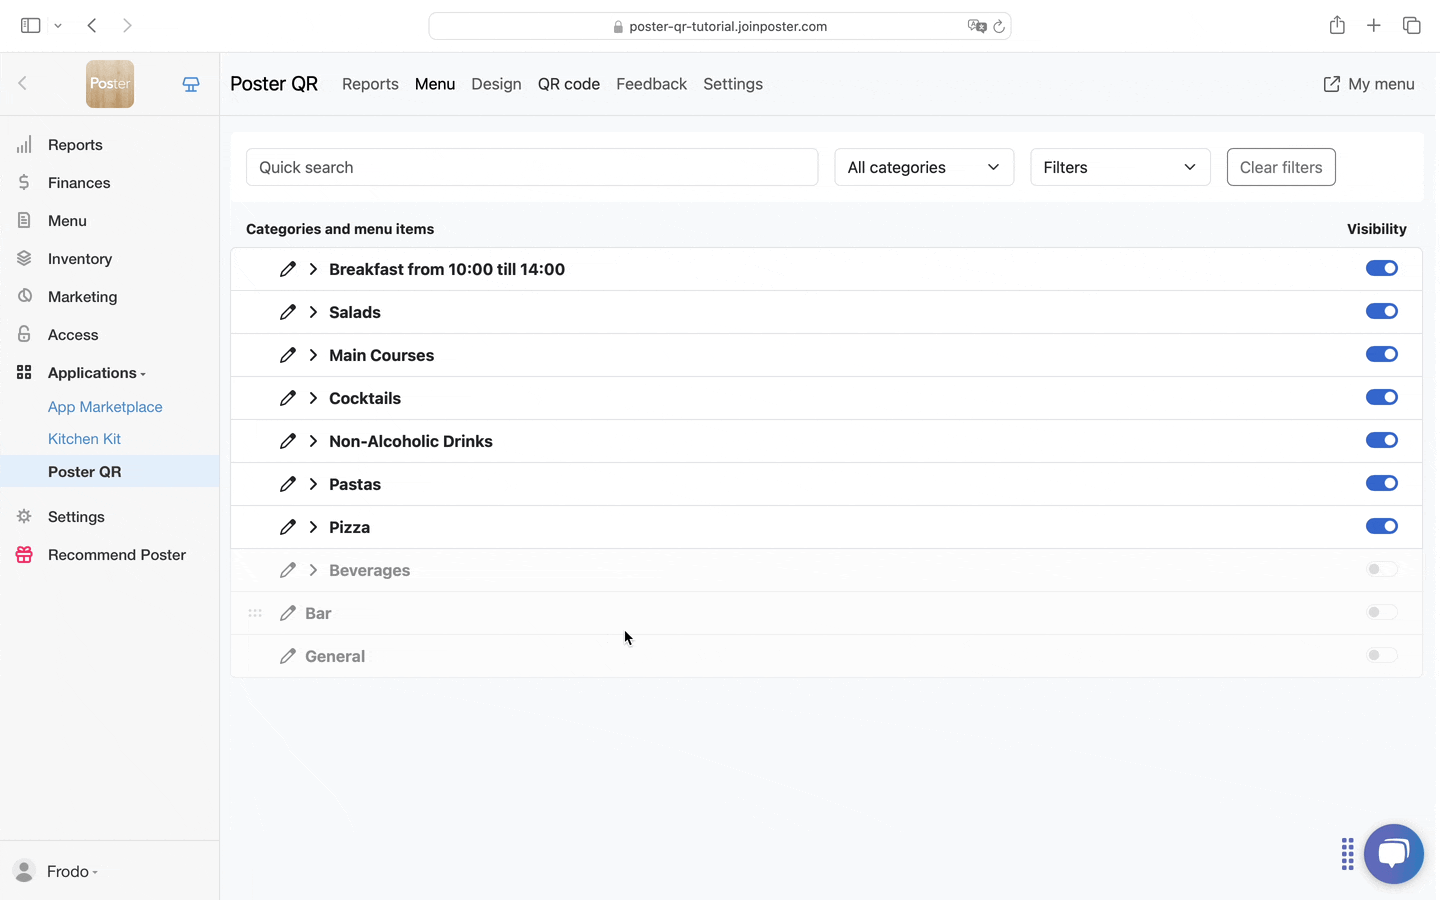
Organize Categories and Dishes
☝️ Changing product name, image, or price in Poster QR does not affect products in the management console of Poster.
Arrange your menu into two levels:
- Main categories: “Drinks,” “Cuisine,” “Desserts.”
- Subcategories: Group items within each main category. For example, under “Cuisine,” you might have “Breakfast,” “Pasta,” and “Main Courses.”
👉 Avoid ALL CAPS or punctuation in titles. Use short labels: Breakfast 10:00–2:00 pm.
💡 Too many categories? Combine or move some into subcategories.
Edit the Sequence and Display of Categories, Subcategories, and Dishes:
- Open the Menu tab in the Poster QR app.
- Press and hold the 𓃎 icon next to a category or dish name, then drag it to your desired position. For instance, move the “Cocktails” category to the “Bar” section or shift a dish from “Desserts” to “Breakfast.”
- To rename a category, tap the ✏️ icon next to its name.
- Toggle off the Display switch for any category or dish you’d like to hide. For example, you might disable mulled wine during the summer season.

💡 Two-level menu is available if at least one of the categories has a subcategory. To have all categories displayed on the same level, move them into the main list.
Add Descriptions and Photos
-
Keep names short. Add details in the description.
-
Limit descriptions to 250 characters.
-
Add weight on a separate line at the end:
Raisin and candied fruit bun filled with pistachio cream 770 g
- In the Menu tab, tap the dish name you’d like to edit.
💡 Use the filters at the top of the page to quickly locate items without photos or descriptions. - Add a description to each dish, detailing its features, potential allergens, and calorie count—or share its story (for example, mention local ingredients or a recommended wine pairing).
💡 Enhance your descriptions with icons such as 🔥 for spiciness or 🦐 if the dish contains seafood. - Upload attractive photos to help customers decide on their order.
💡 Upload your images in JPG, PNG, or JPEG format, minimum width 640 px. In lists, guests see 3:3; in dish cards, 4:3. - Enable Promote in the Popular section for dishes you want to highlight.
- Enable Hide from QR Menu if an item is temporarily unavailable.
💡 Note that a + icon will automatically appear for dishes with modifiers.
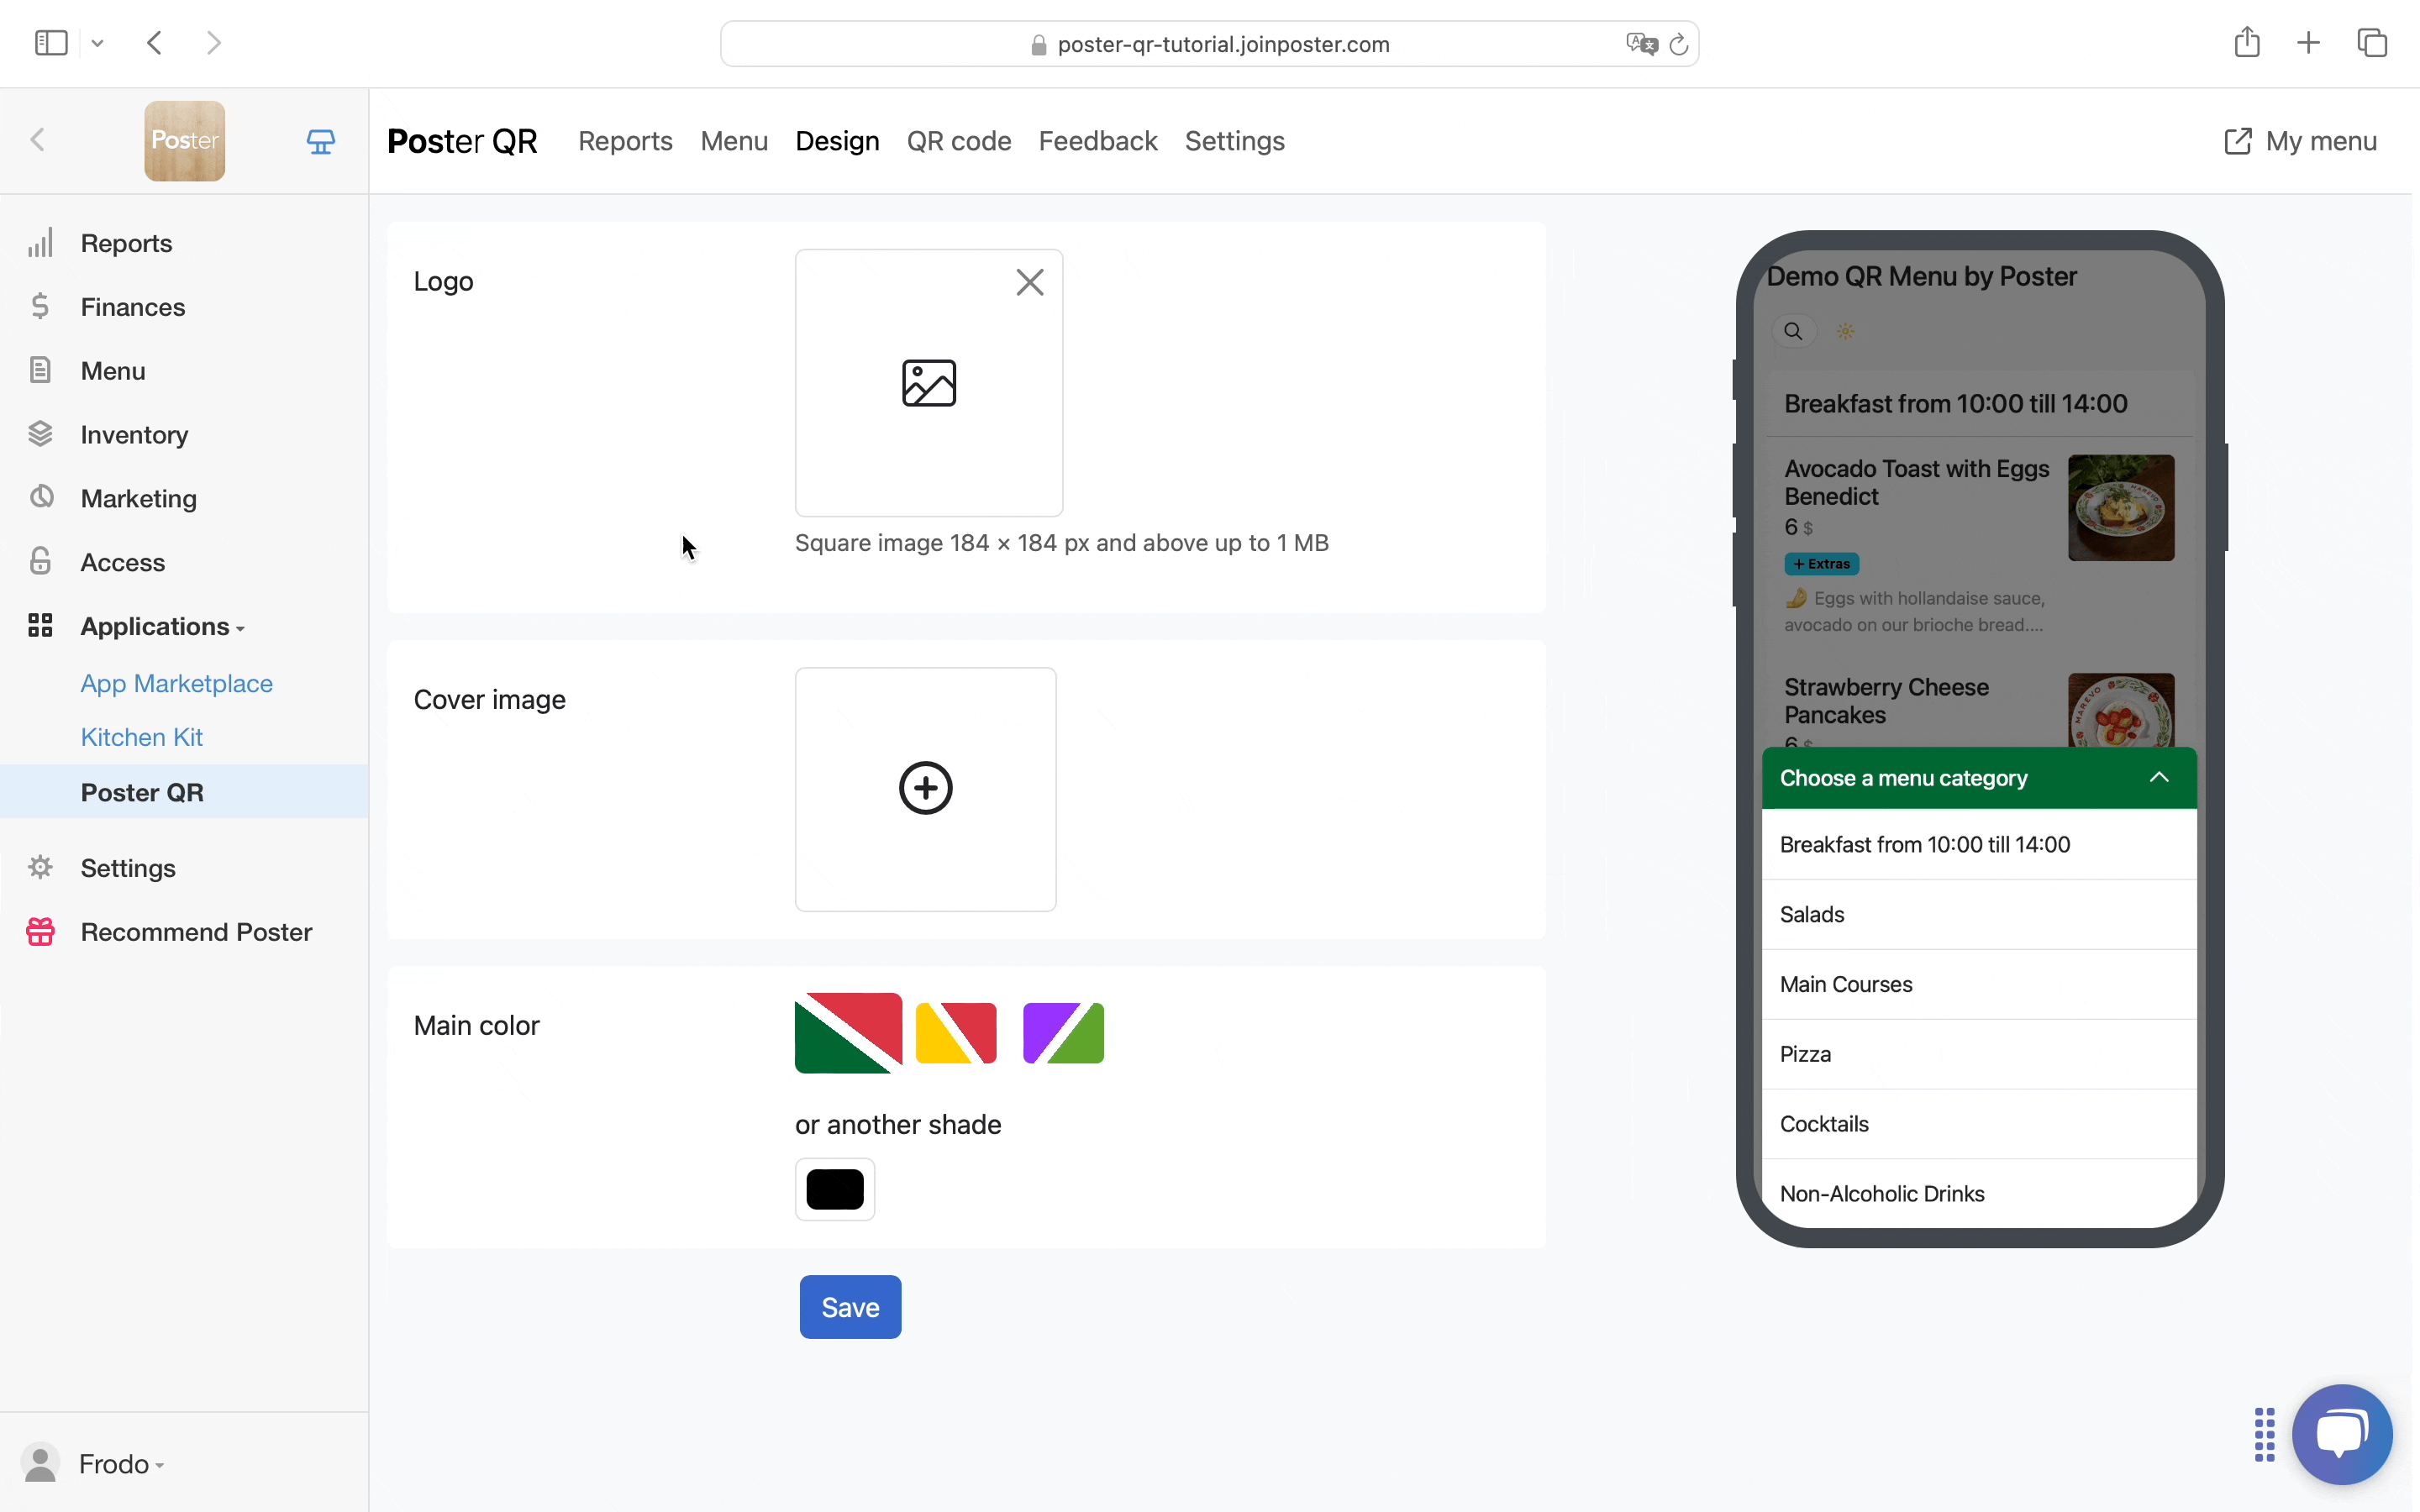
Customize the QR Menu Design
- Add your logo using an image 192×192 pixels in JPG, PNG, or JPEG format, up to 1 MB. Use a simple graphic symbol instead of text.
- Choose an accent color for buttons and text.
- Add a slide on the main page of your QR menu to capture visitors’ attention—this can showcase current promotions, photos of your venue, limited-time offers, or details about volunteer initiatives.
💡 Use images with a 16:9 aspect ratio (for example, 1920 × 1080 pixels) that reflect your brand style or marketing message. Keep it minimal: 3–4 banners are enough.
Add Contacts
Include your social media links, phone number, and Wi-Fi details so that customers have all the essential information in one convenient QR code at their table.
To add your contact details:
- Navigate to Poster QR → Settings.
- Enter your phone number, email, and address.
- Provide the Wi-Fi network name and password. Don’t forget the city for SEO.
- Add links to your location's social media accounts (Instagram, Facebook, TikTok, Telegram, X/Twitter, and YouTube).
- Tap Save to confirm your updates.

Preview how your new descriptions and QR menu settings look by clicking My Menu in the top right corner of the page.
Place stickers on tables, waiting areas, or displays. This way guests can instantly open your online menu and leave feedback.